Creating Templates (Super Admin)
The Template Editor is the admin tool for creating, editing, and validating channel-specific templates that follow your brand guidelines. Its purpose isn't free-form design — it's producing templates that are brand-compliant and verifiable. A template is locked to a specific Channel + Usage Type + size, and it's where you decide which elements are fixed (logo, legal text) and which the Editor can change. It's at Admin → Templates.
Create a template
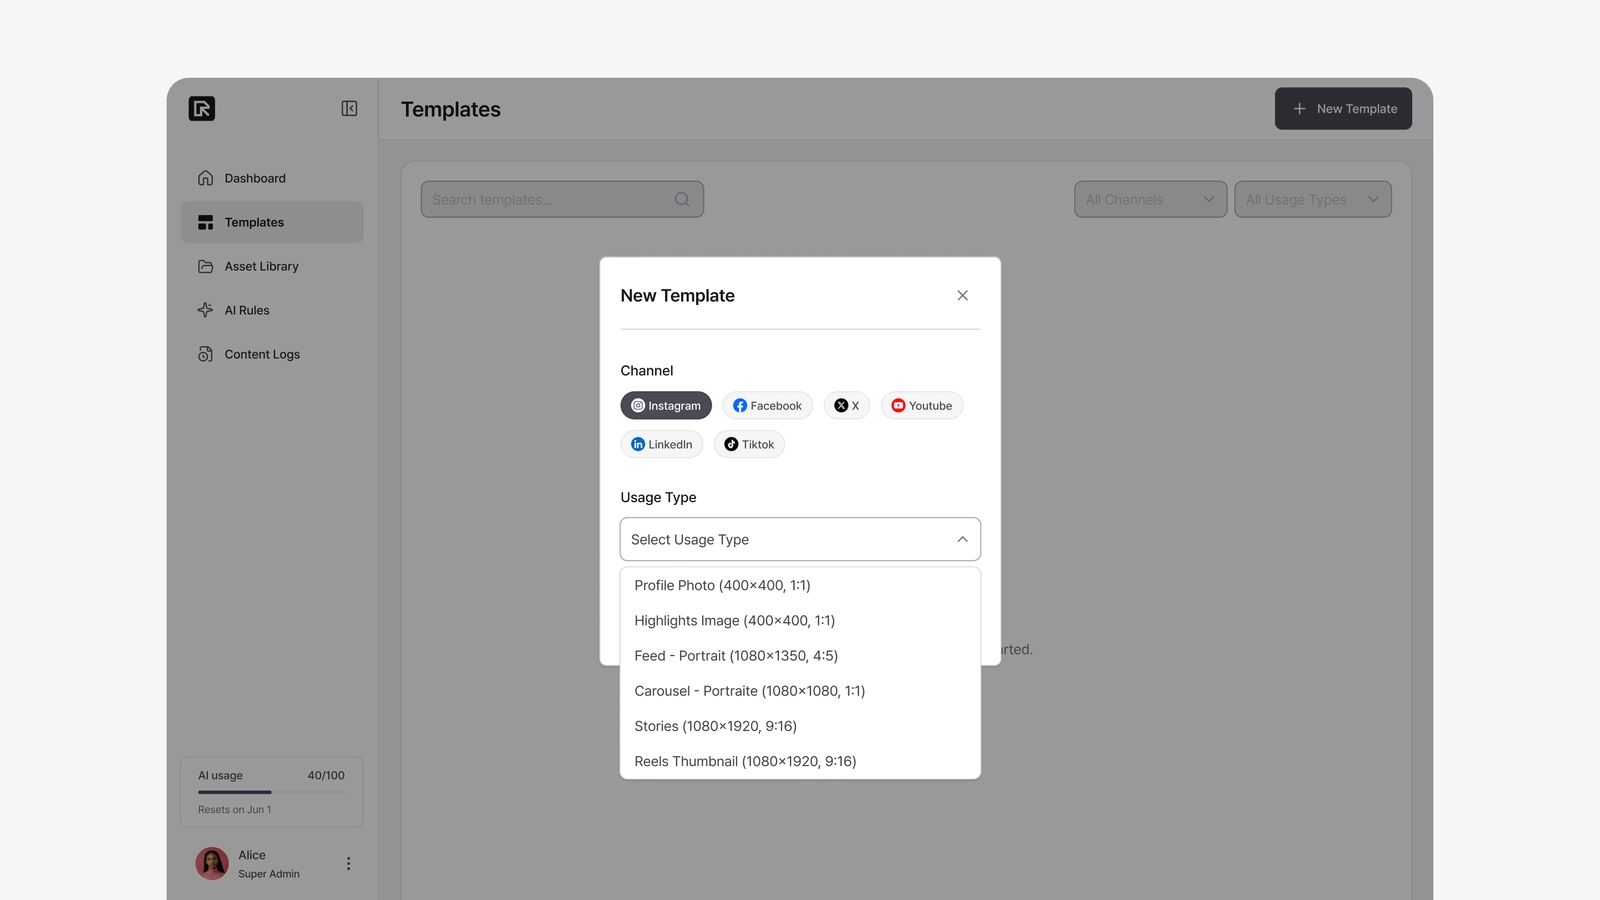
- Click New Template.
- Choose a Channel (Instagram, Facebook, X, YouTube, LinkedIn, TikTok), then a Usage Type (Feed, Stories, etc.). The canvas size comes from these presets.
- These choices can't be changed after creation, so choose carefully.
- You're taken straight into the template editor.
The editor
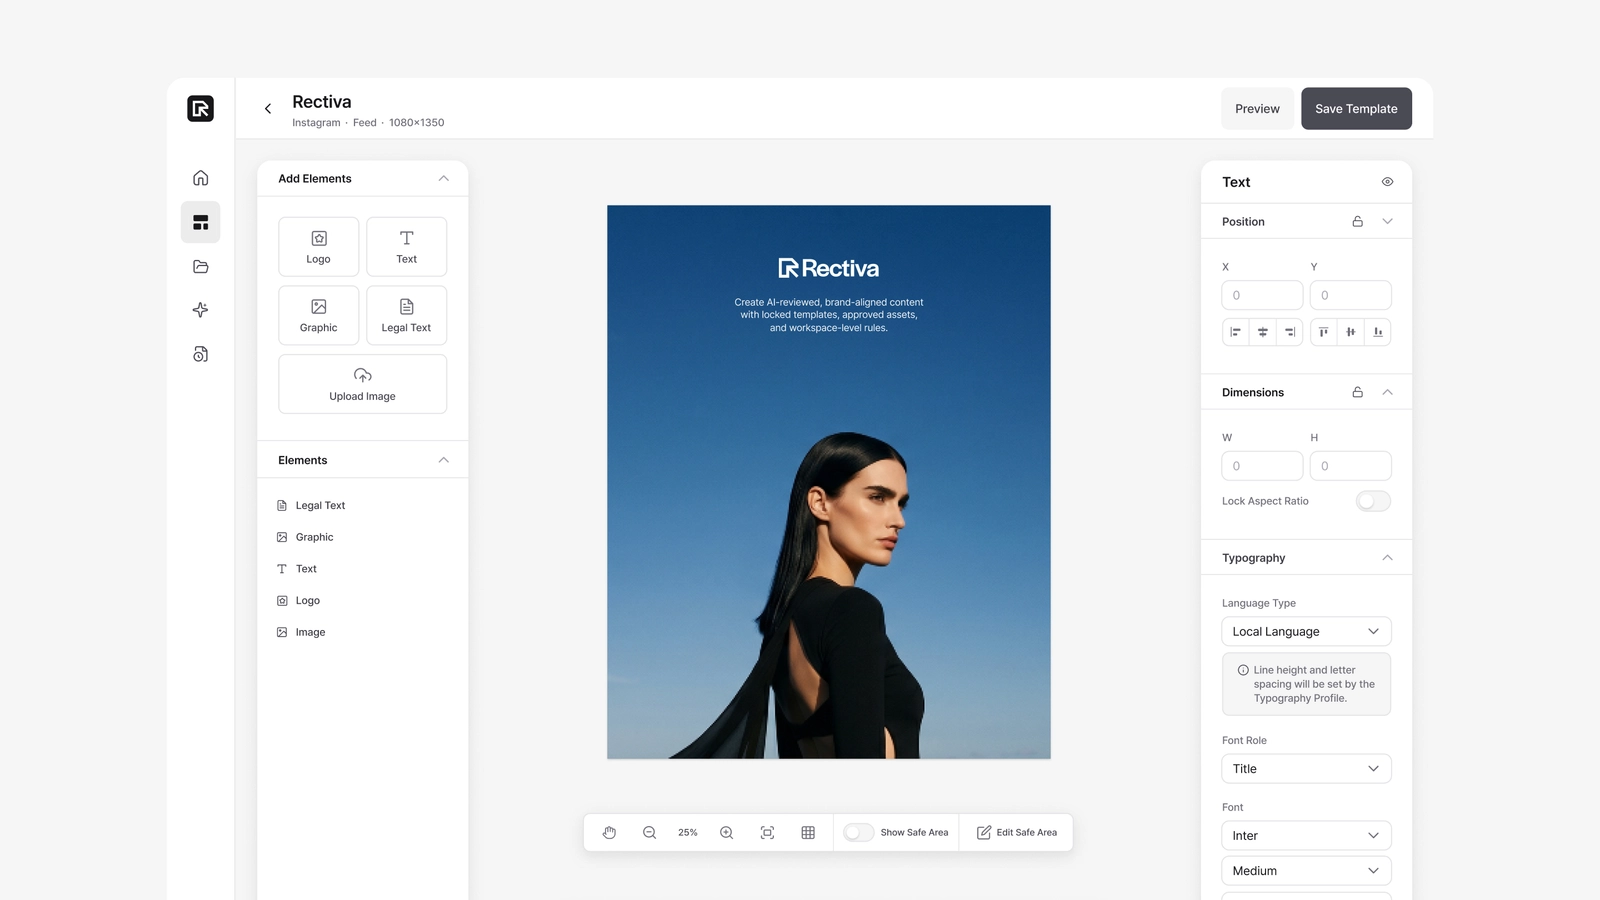
Three areas: the element sidebar (left — add elements and manage layers), the canvas (center), and the properties panel (right — edit the selected element).
Element types
| Element | Notes |
|---|---|
| Logo | From the Asset Library. |
| Text | Title or Body text. Its font comes from the fonts in your Asset Library. |
| Legal Text | A pre-defined legal string from the Asset Library — not freely editable. |
| Graphic | A brand graphic from the Asset Library. |
| Background Image | The main image area. |
Layer order is automatic (background → graphic → text → logo on top); there's no manual z-index. Each element can be locked so Editors can't move or change it — this is how you fix the brand-critical parts in place.
Marking text for local typography
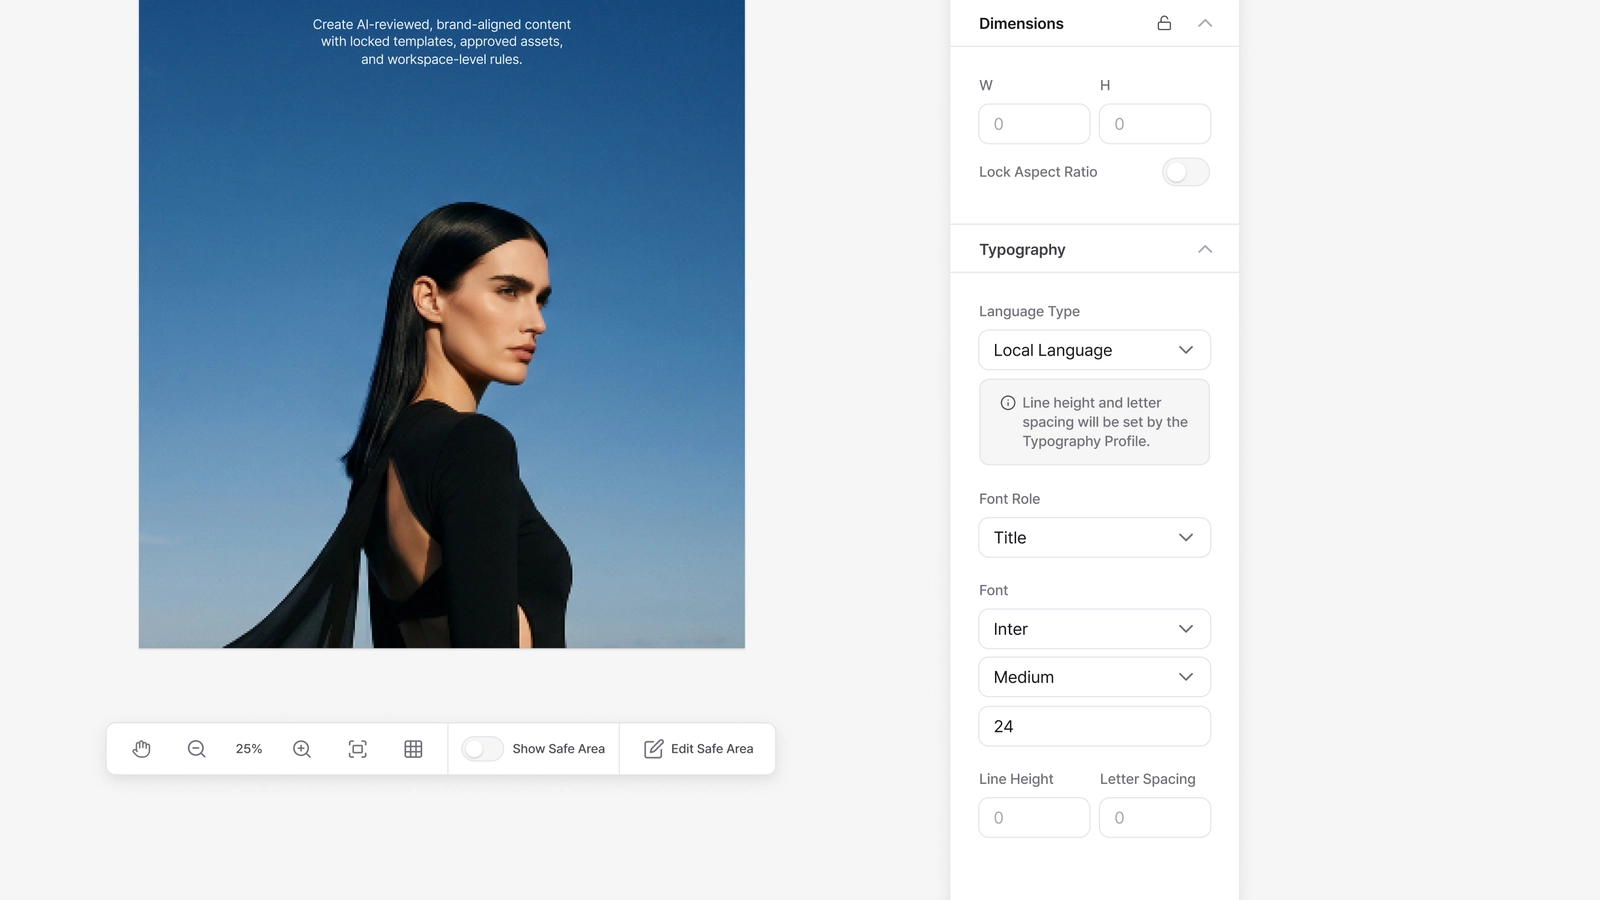
This step connects templates to your typography profiles. Select a text element and look at the Typography section of the properties panel.
Language Type
| Setting | Effect |
|---|---|
| English (default) | The text keeps the template's typography in every market. Use it for global text like a brand slogan. |
| Local Language | The text takes the country's typography profile (its line-height and letter-spacing) when an Editor creates a project. |
If left unset, the text defaults to English and the typography profile won't apply. So any text you want localized should be set to Local Language.
Font Role
Mark each text element as Title or Body. This decides which half of the typography profile applies (the profile defines Title and Body spacing separately). Legal Text is always treated as Body.
As noted in the typography guide, "Local Language" applies the profile's line-height and letter-spacing — the typeface stays as set on the element. To match the intended look, set the element's font to the same family as the profile.
Save & preview
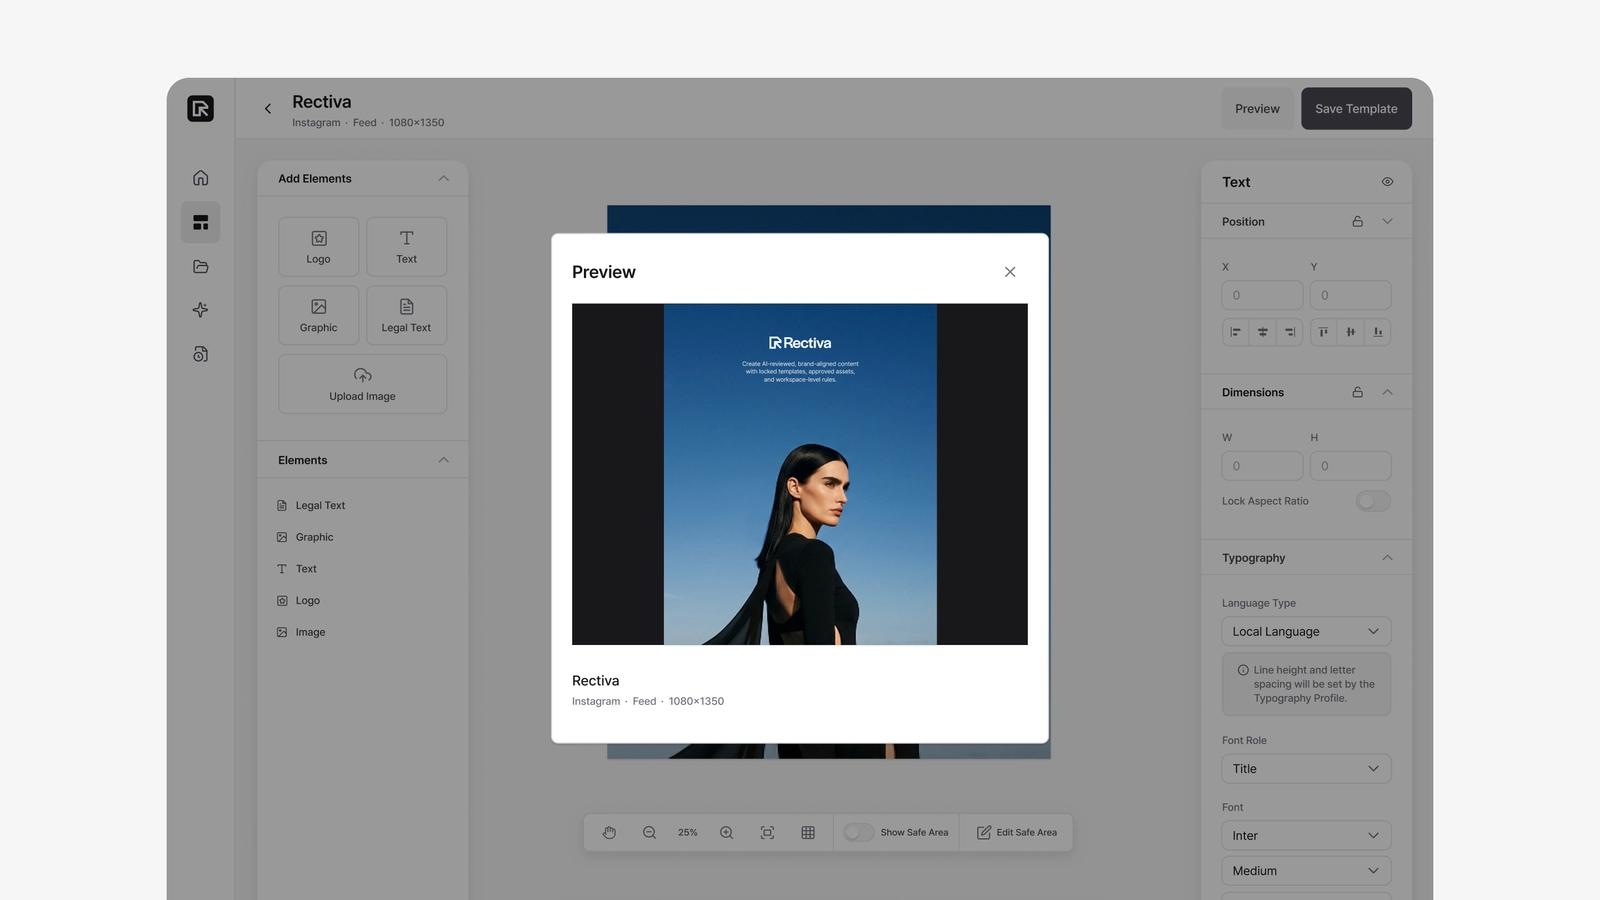
Save stores the canvas and generates a preview image automatically. Use Preview to see exactly what an export will look like — transparent background shown as a checkerboard, Safe Areas hidden — without changing your work.
Deleting a template: projects already created from it are kept, but no new projects can be created from it, and it no longer appears in the Editor's template list.